
Did you know that clogged dryer vents cause over 15,000 fires in the US each year? Yes, it is true. And as experts in the field, we understand the importance of maintaining a clean and well-functioning dryer vent system.
In this article, we will provide you with step-by-step instructions and valuable tips to ensure your dryer vent remains clean and free from debris. By following our expert advice, you can enhance the efficiency of your dryer and safeguard your home from potential risks.
Understanding the Importance of Cleaning Your Dryer Vent
Before we dive into the cleaning process, it’s crucial to comprehend why regular maintenance of your dryer vent is necessary. Over time, lint, dust, and other debris can accumulate in your vent, obstructing the airflow. This build-up restricts the dryer’s ability to expel hot, moist air, resulting in longer drying times and increased energy consumption. Moreover, a clogged dryer vent can lead to excessive heat buildup, which can potentially ignite the accumulated lint, leading to a dangerous fire hazard.
Warning Signs It’s Time for a Dryer Vent Cleaning
Here are some of the major warning signs that announce wide and clear that it is time for a dryer vent cleaning !
❌ Clothes taking multiple cycles to dry
❌ Strange burning smell on your garments
❌ Excessive heat in the laundry room while the dryer is running
Step-by-Step Guide for Dryer Vent Cleaning
Step 1: Gather the Necessary Tools and Materials
To begin the cleaning process, ensure you have the following tools and materials readily available:
- Screwdriver
- Vent brush or cleaning kit
- Vacuum cleaner with a long hose attachment
- Duct tape
- Safety gloves
Step 2: Disconnect the Dryer
Before starting the cleaning procedure, disconnect your dryer from the power source. This ensures your safety and prevents any accidental operation during the cleaning process.
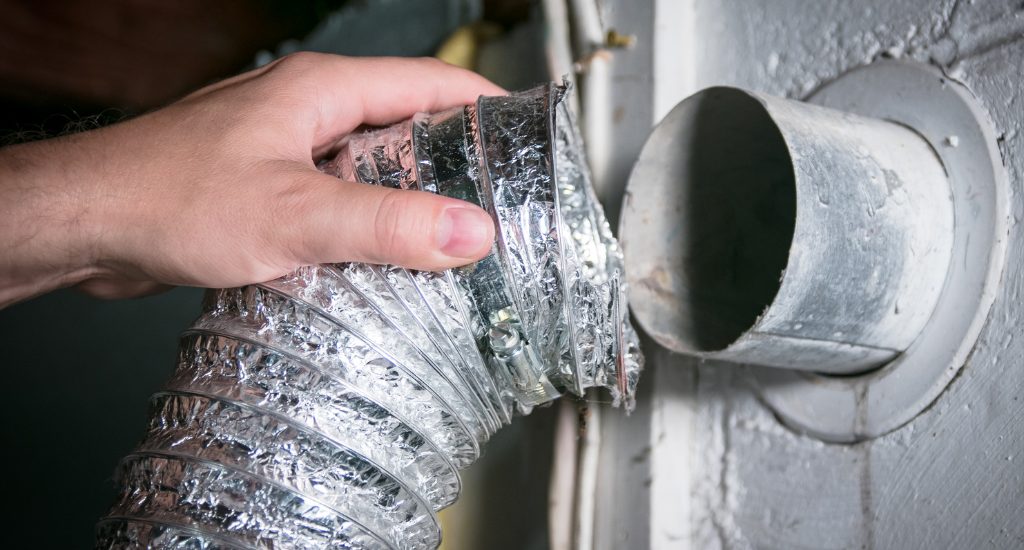
Step 3: Locate the Dryer Vent
Locate the exterior vent opening of your dryer. It is usually situated on the outside of your home’s wall, near the laundry room. Once you’ve identified the vent, visually inspect it for any visible signs of lint or debris accumulation.
Step 4: Remove the Vent Cover
Using a screwdriver, carefully remove the vent cover to gain access to the interior of the vent. Set aside the screws in a safe place to avoid misplacing them.
Step 5: Clean the Exterior Vent Opening
Inspect the exterior vent opening for any visible obstructions. Gently remove any lint or debris using your hands or a brush. Be cautious not to push the debris further into the vent.
Step 6: Connect the Vacuum Cleaner
Attach the long hose attachment of your vacuum cleaner to remove the loose lint and debris from the vent. Ensure the hose reaches as far as possible into the vent to eliminate any hidden blockages effectively. Slowly and methodically move the hose back and forth while applying gentle suction to dislodge and collect the accumulated debris.
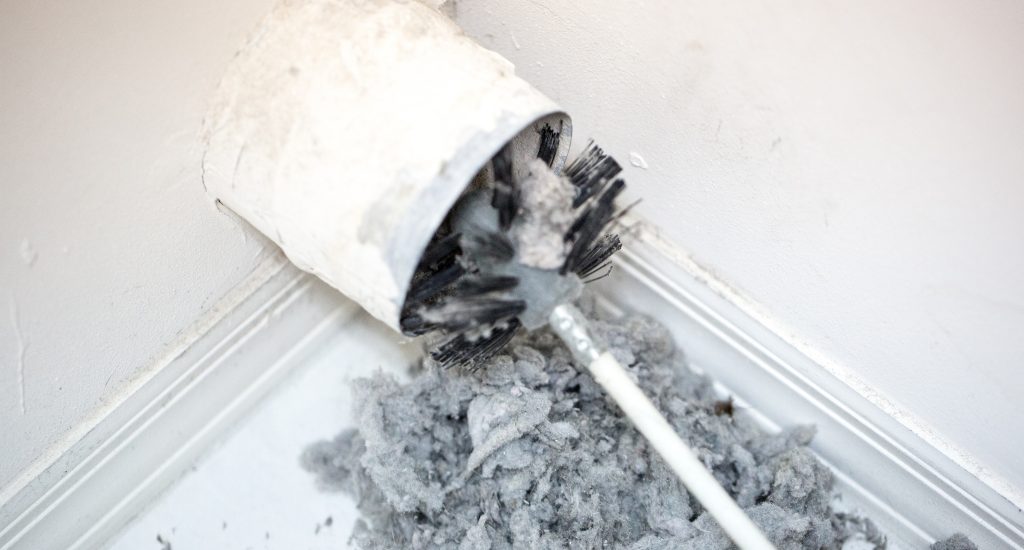
Step 7: Clean the Vent Pipe
Now it’s time to clean the interior vent pipe leading from the dryer to the exterior opening. Use a vent brush or a specialized vent cleaning kit to navigate through the vent, removing any remaining lint or debris. The brush or kit should be long enough to reach the entire length of the vent pipe.
Step 8: Vacuum Once Again
After brushing the vent pipe, vacuum the interior of the dryer to collect any dislodged lint or debris. Pay extra attention to the lint trap and its surrounding area, as these tend to accumulate significant amounts of lint over time.
Step 9: Reattach the Vent Cover
Once you’ve completed the cleaning process, carefully reattach the vent cover using the screws you set aside earlier. Ensure it is secured firmly to prevent any future debris accumulation.
Maintaining a Clean Dryer Vent: Helpful Tips
| ✅ Regularly Clean the Lint Trap | To prevent lint buildup and maintain proper airflow, it is essential to clean the lint trap after every dryer cycle. Simply remove the lint screen located inside the dryer door or on top of the dryer and remove any lint accumulated. Rinse the screen with water to remove any stubborn debris, dry it thoroughly, and reinsert it back into the dryer. This simple step goes a long way in ensuring optimal dryer performance. |
| ✅ Check and Clean the Vent Regularly | In addition to cleaning the lint trap, it’s important to inspect the dryer vent system regularly. Keep an eye out for any signs of blockage, such as longer drying times, excessive heat, or a musty odor. At least once a year, repeat the cleaning process outlined above to remove any accumulated lint or debris that may hinder proper airflow. By doing so, you’ll maintain a clean and efficient dryer vent system. |
| ✅ Be Mindful of Dryer Vent Placement | The placement of your dryer vent can also affect its performance and susceptibility to blockages. Ensure that the vent pipe is as straight and short as possible, with minimal bends or turns. Long, convoluted vent pipes can impede airflow and make cleaning more challenging. If needed, consider hiring a professional to assess and optimize your dryer vent system for maximum efficiency. |
| ✅ Avoid Overloading the Dryer | Overloading the dryer with excessive amounts of laundry can contribute to lint buildup. When clothes are packed tightly, they generate more lint, which can easily find its way into the vent system. To prevent this, follow the manufacturer’s guidelines for load capacity and avoid overstuffing the dryer. This not only helps maintain a cleaner vent but also extends the lifespan of your dryer. |
| ✅ Educate Household Members on Dryer Safety | Properly maintaining a clean dryer vent is a collective effort. Educate your household members about the importance of cleaning the lint trap after each use and how to recognize signs of a clogged vent. By fostering awareness and responsibility, everyone can contribute to a safer and more efficient laundry routine. |
Safeguard Your Home: Clean Your Dryer Vent!
Keeping your dryer vent clean is crucial for optimal performance and reducing the risk of fire hazards. By following the step-by-step guide provided in this article and implementing our helpful maintenance tips, you can ensure a clean and efficient dryer vent system.
Regular cleaning, attention to detail, and ongoing vigilance are key to maintaining a safe and reliable drying experience. Remember, a clean dryer vent not only saves you time and energy but also provides peace of mind.